转自:R包shiny开发网页–6.shinydashboard自定义 – 简书
Part1 侧边栏sidebar
1.1.菜单栏与选项卡模版
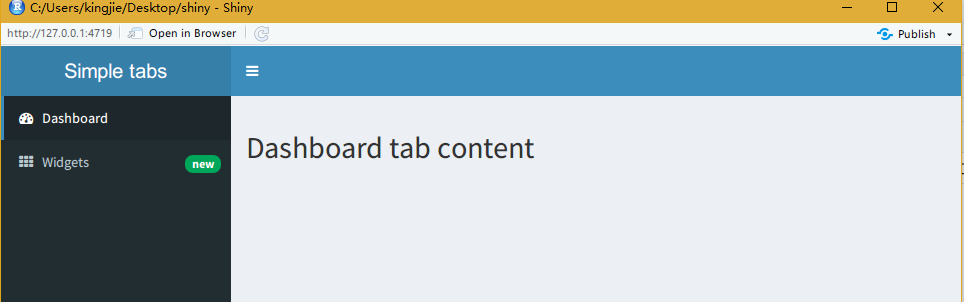
library(shiny)
library(shinydashboard)
sidebar <- dashboardSidebar(
  sidebarMenu(
    menuItem("Dashboard", tabName = "dashboard", icon = icon("dashboard")),
    menuItem("Widgets", icon = icon("th"), tabName = "widgets",
             badgeLabel = "new", badgeColor = "green")
  )
)

body <- dashboardBody(
  tabItems(
    tabItem(tabName = "dashboard",
            h2("Dashboard tab content")
    ),

    tabItem(tabName = "widgets",
            h2("Widgets tab content")
    )
  )
)

ui <- dashboardPage(
  dashboardHeader(title = "Simple tabs"),
  sidebar,
  body
)
server <- function(input, output) {
}
shinyApp(ui, server)
1.2.侧边栏输入
(1)搜索框
library(shiny)
library(shinydashboard)
ui <- dashboardPage(
  dashboardHeader(),
  dashboardSidebar(
    sidebarSearchForm(textId = "searchText", buttonId = "searchButton",
                      label = "Search...")
  ),
  dashboardBody()
)
server <- function(input, output) { }
shinyApp(ui, server)
(2)再加上滑动输入和文本输入
library(shiny)
library(shinydashboard)
ui <- dashboardPage(
  dashboardHeader(),
  dashboardSidebar(
    sidebarSearchForm(textId = "searchText", buttonId = "searchButton",
                      label = "Search..."),
    sliderInput("integer", "Integer:",
                min=0, max=1000, value=500),
    textInput("text","textInput:")
  ),
  dashboardBody()
)
server <- function(input, output) { }
shinyApp(ui, server)
(3)停用侧边栏
dashboardSidebar(disable = TRUE)
Part2 正文-body
参考学习:http://rstudio.github.io/shinydashboard/structure.html#boxes
2.1.基本框
shinydashboard基本构建块是box。box()可以创建基本框,框里的内容可以是大多数的UI控件。
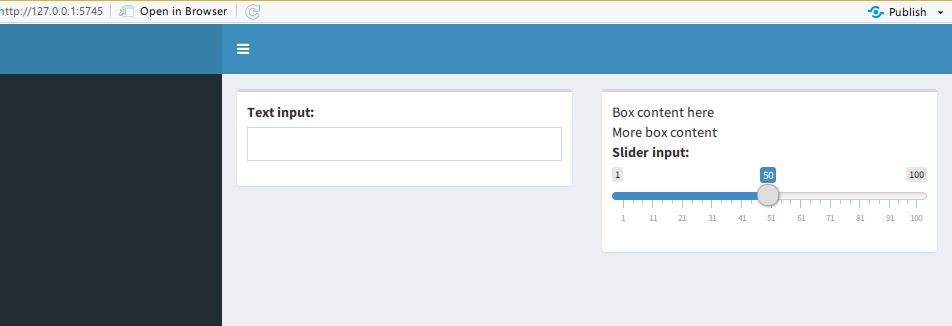
在同一行放两个box:一个文本输入框,一个滑块
library(shiny)
library(shinydashboard)
ui <- dashboardPage(
dashboardHeader(),
dashboardSidebar(),
dashboardBody(
fluidRow(
box(textInput("text", "Text input:")),
box(
"Box content here", br(), "More box content",
sliderInput("slider", "Slider input:", 1, 100, 50)
)
)
)
)
server <- function(input, output) { }
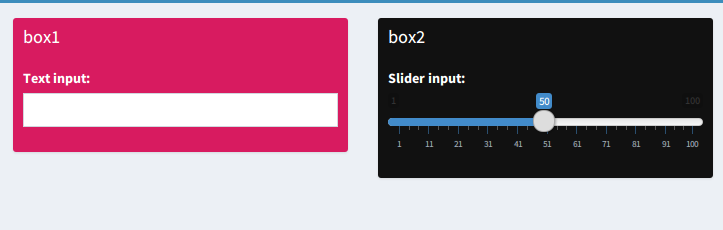
shinyApp(ui, server)2.2.设置标题(title)和标题栏(header bar)颜色(status)
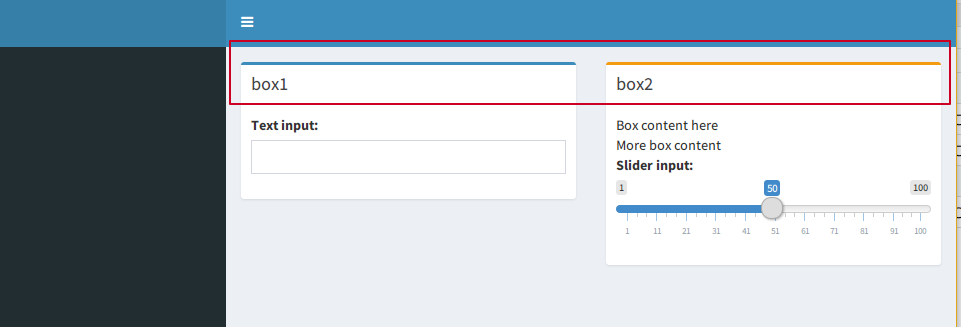
在这里status = “primary”显示了蓝色,status = “warning”显示了橙黄色
library(shiny)
library(shinydashboard)
ui <- dashboardPage(
dashboardHeader(),
dashboardSidebar(),
dashboardBody(
fluidRow(
box(title = "box1", status = "primary",
textInput("text", "Text input:")),
box(title = "box2", status = "warning",
"Box content here", br(), "More box content",
sliderInput("slider", "Slider input:", 1, 100, 50)
)
)
)
)
server <- function(input, output) { }
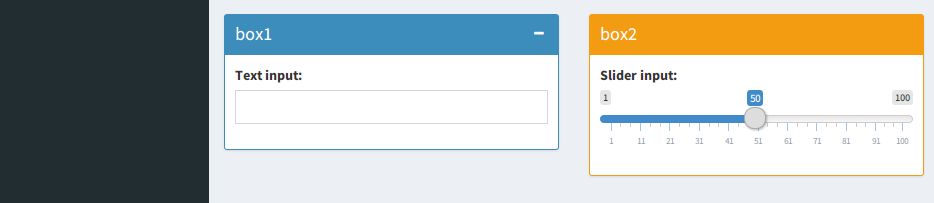
shinyApp(ui, server)2.3.实体标题栏、可折叠box
solidHeader = TRUE可以设置这种格式,collapsible = TRUE可以设置box可折叠。
library(shiny)
library(shinydashboard)
ui <- dashboardPage(
  dashboardHeader(),
  dashboardSidebar()
  dashboardBody(
    fluidRow(
      box(title ="box1",status = "primary",solidHeader = TRUE,
          collapsible = TRUE,
        textInput("text", "Text input:")),
      box(title ="box2",status = "warning",solidHeader = TRUE,
        sliderInput("slider", "Slider input:", 1, 100, 50)
      )
    )
  )
)
server <- function(input, output) { }
shinyApp(ui, server)
2.4.带背景色的box
library(shiny)
library(shinydashboard)
ui <- dashboardPage(
dashboardHeader(),
dashboardSidebar(),
dashboardBody(
fluidRow(
box(title = "box1", background = "maroon",
textInput("text", "Text input:")
),
box(title = "box2", background = "black",
sliderInput("slider", "Slider input:", 1, 100, 50)
)
)
)
)
server <- function(input, output) { }
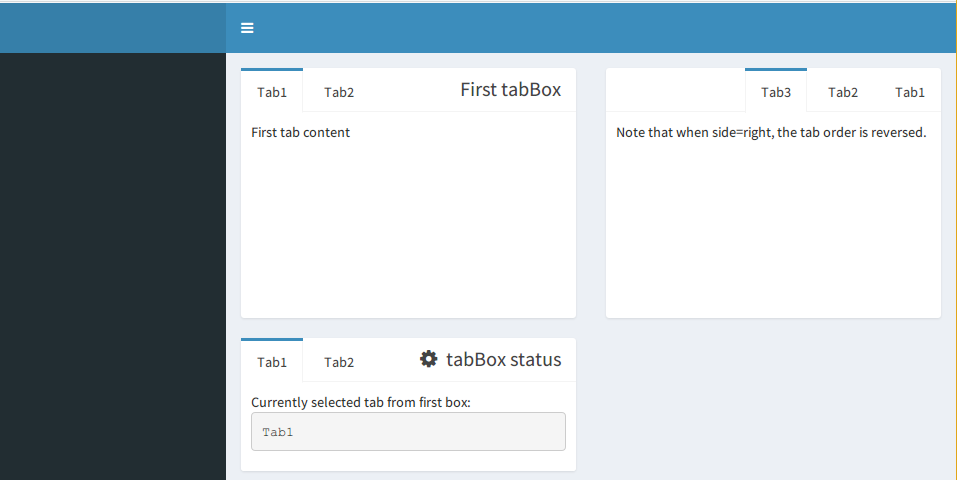
shinyApp(ui, server)2.5.标签box
library(shiny)
library(shinydashboard)
body <- dashboardBody(
fluidRow(
tabBox(
title = "First tabBox",
# The id lets us use input$tabset1 on the server to find the current tab
id = "tabset1", height = "250px",
tabPanel("Tab1", "First tab content"),
tabPanel("Tab2", "Tab content 2")
),
tabBox(
side = "right", height = "250px",
selected = "Tab3",
tabPanel("Tab1", "Tab content 1"),
tabPanel("Tab2", "Tab content 2"),
tabPanel("Tab3", "Note that when side=right, the tab order is reversed.")
)
),
fluidRow(
tabBox(
# Title can include an icon
title = tagList(shiny::icon("gear"), "tabBox status"),
tabPanel("Tab1",
"Currently selected tab from first box:",
verbatimTextOutput("tabset1Selected")
),
tabPanel("Tab2", "Tab content 2")
)
)
)
ui <- dashboardPage(
dashboardHeader(),
dashboardSidebar(),
body)
server <- function(input, output) {
output$tabset1Selected <- renderText({
input$tabset1
})
}
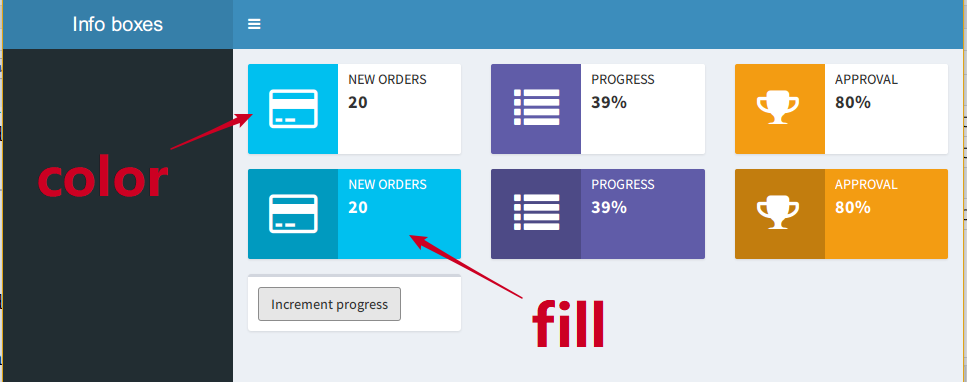
shinyApp(ui, server)2.6.infobox
一种特殊的box,用于显示简单的数字或文本值,带有图标。
第一行是无填充的,第二行是有填充。
library(shinydashboard)
ui <- dashboardPage(
dashboardHeader(title = "Info boxes"),
dashboardSidebar(),
dashboardBody(
# 无填充的box
fluidRow(
# 静止
infoBox("New Orders", 10 * 2, icon = icon("credit-card")),
# 动态
infoBoxOutput("progressBox"),
infoBoxOutput("approvalBox")
),
# 有填充的框
fluidRow(
infoBox("New Orders", 10 * 2, icon = icon("credit-card"), fill = TRUE),
infoBoxOutput("progressBox2"),
infoBoxOutput("approvalBox2")
),
fluidRow(
# 点一次加一个数
box(width = 4, actionButton("count", "Increment progress"))
)
)
)
server <- function(input, output) {
output$progressBox <- renderInfoBox({
infoBox(
"Progress", paste0(25 + input$count, "%"), icon = icon("list"),
color = "purple"
)
})
output$approvalBox <- renderInfoBox({
infoBox(
"Approval", "80%", icon = icon("thumbs-up", lib = "glyphicon"),
color = "yellow"
)
})
# Same as above, but with fill=TRUE
output$progressBox2 <- renderInfoBox({
infoBox(
"Progress", paste0(25 + input$count, "%"), icon = icon("list"),
color = "purple", fill = TRUE
)
})
output$approvalBox2 <- renderInfoBox({
infoBox(
"Approval", "80%", icon = icon("thumbs-up", lib = "glyphicon"),
color = "yellow", fill = TRUE
)
})
}
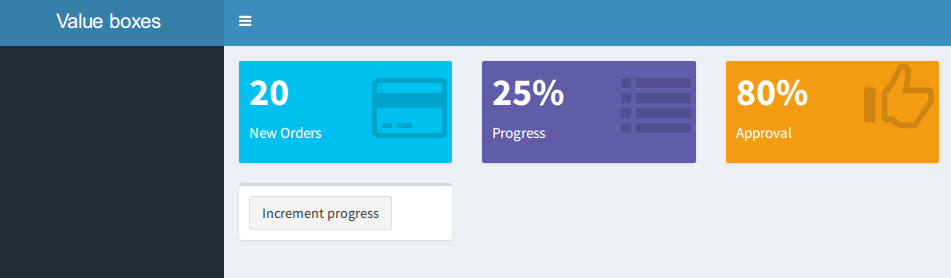
shinyApp(ui, server)2.7.valueBox
和info的区别好像是图标嵌入?
library(shinydashboard)

ui <- dashboardPage(
  dashboardHeader(title = "Value boxes"),
  dashboardSidebar(),
  dashboardBody(
    fluidRow(
      # A static valueBox
      valueBox(10 * 2, "New Orders", icon = icon("credit-card")),

      # Dynamic valueBoxes
      valueBoxOutput("progressBox"),

      valueBoxOutput("approvalBox")
    ),
    fluidRow(
      # Clicking this will increment the progress amount
      box(width = 4, actionButton("count", "Increment progress"))
    )
  )
)

server <- function(input, output) {
  output$progressBox <- renderValueBox({
    valueBox(
      paste0(25 + input$count, "%"), "Progress", icon = icon("list"),
      color = "purple"
    )
  })

  output$approvalBox <- renderValueBox({
    valueBox(
      "80%", "Approval", icon = icon("thumbs-up", lib = "glyphicon"),
      color = "yellow"
    )
  })
}

shinyApp(ui, server)
Part3 外观美化
本部分包括调节皮肤、box颜色、图标、标题和侧边栏加宽的代码。
整理自:https://rstudio.github.io/shinydashboard/appearance.html#logout-panel
3.1.皮肤:skin
指定主题颜色,主要是标题栏的颜色
默认是:dashboardPage(skin = “blue”)
还有“blue”, “black”, “purple”, “green”, “red”, “yellow”可选,好玩的是,选black标题栏就变成白色了。

白色丑哭了
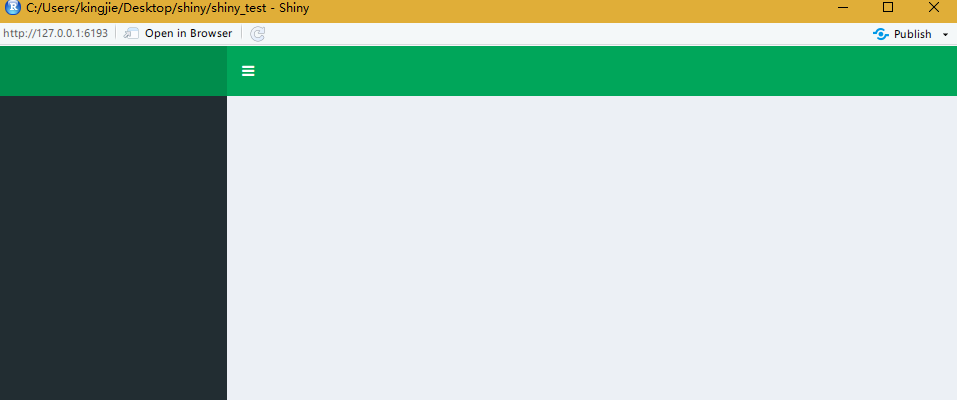
绿色蛮顺眼
header <- dashboardHeader()
sidebar <- dashboardSidebar()
body <- dashboardBody()
ui <- dashboardPage(skin = "green",
  header, sidebar, body)
server= function(input, output) { }
shinyApp(ui = ui, server=server )
3.2.box颜色:status或color

status

color
3.3.图标
图标来自Font-Awesome和Glyphicons。所有可用图标列表:
- http://fontawesome.io/icons/
- http://getbootstrap.com/components/#glyphicons/
使用的命令
"doudou:", icon("calendar"),
"huahua:", icon("cog", lib = "glyphicon")
以上两行代码分别是这两个网站对应的图标使用方法。
举例:

header <- dashboardHeader()
sidebar <- dashboardSidebar()
body <- dashboardBody(box("doudou:", icon("calendar")),
                      box("huahua:", icon("cog", lib = "glyphicon")))
ui <- dashboardPage(skin = "black",
  header, sidebar, body)
server= function(input, output) { }
shinyApp(ui = ui, server=server )
3.4.给侧边栏和标题栏加宽
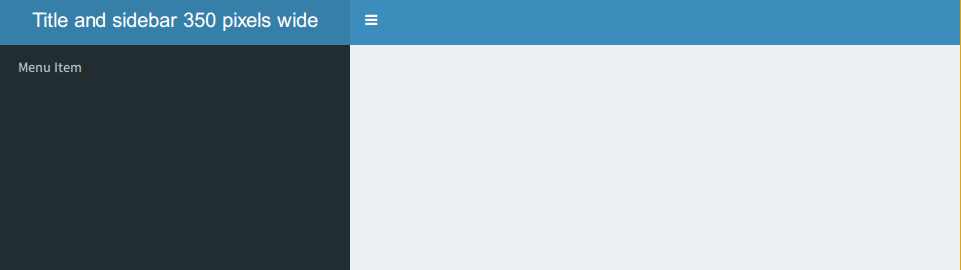
  ui = dashboardPage(
    dashboardHeader(
      title = "Title and sidebar 350 pixels wide",
      titleWidth = 350
    ),
    dashboardSidebar(
      width = 350,
      sidebarMenu(
        menuItem("Menu Item")
      )
    ),
    dashboardBody()
  )
  server = function(input, output) { }

  shinyApp(ui,server)